This is a tutorial to help guide you through the process of powering on and connecting your new Grandstream phone to your network.
If you were handed a box with a phone in pieces and a bunch of cords, and you are not sure what to do next? This is for you.
In your box, you will find the following items:
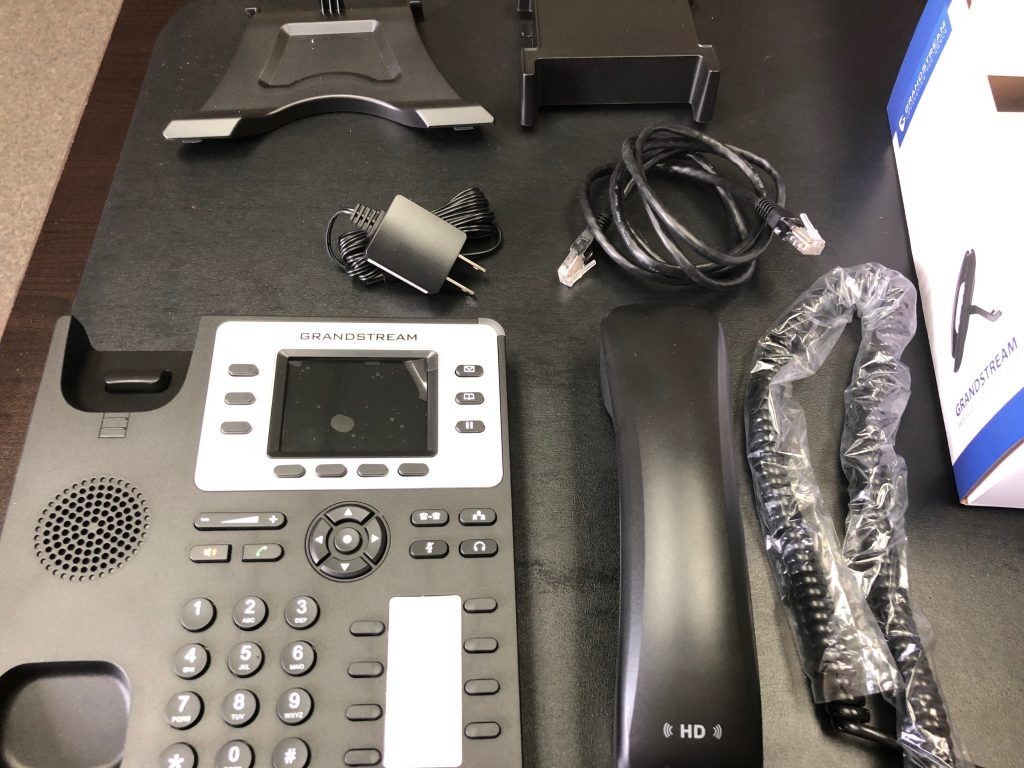
The phone, the handset, the handset cord, the power cord, an ethernet cable, and two different mounting pieces. The top left is for desktop phones, the top right is to wall-mount the phone.
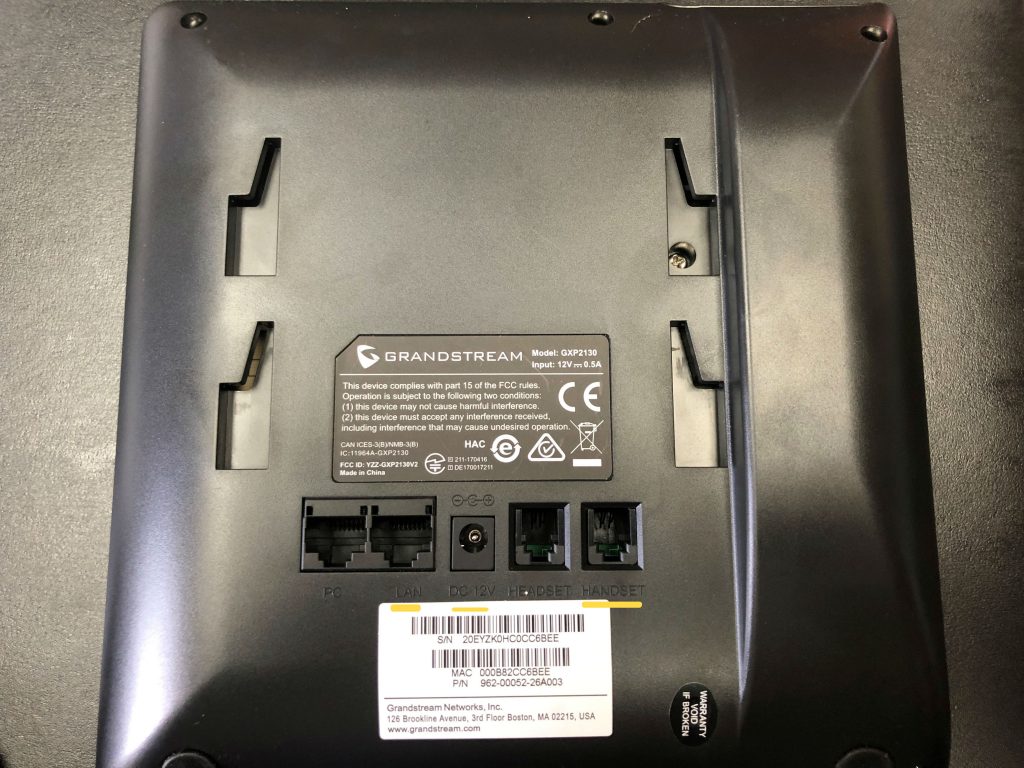
On the back of the phone, there are two ethernet ports, an ac/dc power port, and two phone ports.
The ethernet cable from the box needs to be plugged into the LAN port. The other end of the cable will go to the wall, or switch — however your network is configured.
The handset cord will connect into the HANDSET port, and then to the bottom of the handheld receiver.
To power your phone on, you will need to plug the power cord into the power port, and then into a power outlet. (If you are using a switch that is PoE (powered over ethernet), you will not need to use this cord as the switch can provide the power.)
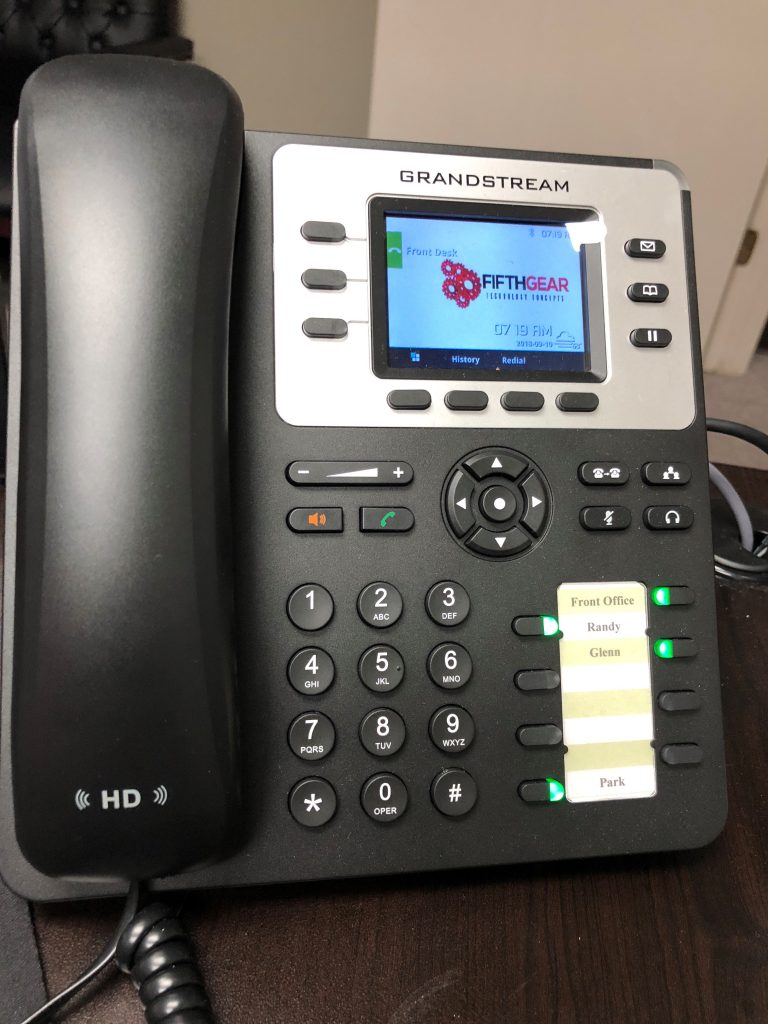
Above is pictured in the desktop mode, with the stand from the top left of the unboxing picture attached to the back.
Hopefully this has helped you assemble, connect and power on your Grandstream phone. The next step in your journey is accessing your voicemail, and recording the greeting. If you have any other questions or topics you would like to see covered, please leave a comment!